Image and video hosting by TinyPic Image and video hosting by TinyPic Image and video hosting by TinyPic Image and video hosting by TinyPic

Wednesday, April 23, 2014

Tips & Tricks: #1 Photographing your product (without professional gear)


I thought it might be nice to impart some of my wisdom, and talk about how I go about photographing my products without professional gear, lights or a light box. This will be especially good for those of you who have new online shops, and perhaps aren't quite there in the photo stage. Trust me, I we've all been there. But as you might know it by now, great photos help you sell better on marketplace websites such as Big Cartel or Etsy.

So let's get started!

Setting up your artwork

Ideally you would like to set up your artwork either outside on an overcast day, or inside in a room with large windows and soft, natural light, out of direct sunlight. If you are photographing inside an using window light, make sure all other lights in the room are turned off.

Hang, or lean your artwork against an object or a wall. If you're in a room and your art is resting on something, make sure the background is a neutral colour (example: concrete, white wall, black table etc.) and not harshly coloured as this will reflect unwanted colours onto your product. Make sure the window(s) are to the sides of you and your product and not behind you to prevent unwanted reflections. You'll also want to make sure that you don't see the resting object in your photo. So make sure it's small enough to be hidden behind your item. I use an empty roll of tape. :)


Set up your camera

Place your camera on a stable, horizontal flat surface. This can be a tripod, or in my case a small bag of basmati rice* on top of some boxes. Make sure it's far enough away from your art so you can zoom in with your lens and fill your camera's screen / viewfinder. You don't want to be too close with your lens zoomed all the way out, or you'll get wide-angle lens distortion. If you don't have a zoom lens, simply place your camera at a distance where your art fills most of your camera's screen.


(*What's great about the rice bag is that if I need to angle my camera, the rice will hold my camera at the angle, without having to hang on to it, in case I need to let go to hold both my product for sizing).


Make sure the lens is parallel and centered with your product. If your work is at an angle, make sure you match that angle with your camera or you'll get perspective distortion, and your work won't appear straight, or the size will be large on top and small on the bottom (or vice versa).

If you don't have a fancy camera, don't worry! Neither do I! Just make sure you can set your camera to the aperture priority, or Av. I set the ISO (film speed) to auto. This will ensure a smooth image without no noise/grain and accurate colours. By the way, you can also take nifty pictures using your iPhone, iPad or Android. Just make sure you download the Snapseed app (which is like Photoshop) to colour correct any photos later on.

Set the white-balance in your camera that corresponds to the type of light you are using. If you're using daylight choose either daylight, cloudy or sunny (depending on your camera's settings). In my case I used cloudy for the photos in this blog.

If your camera has a flash, turn it off. It'll create harsh reflections and they won't mix well with the light you're using.

Go to the dollar store and buy yourself a few pieces of white cardstock. I use these both as backdrop, and to redirect the light back to my product to illuminate the side not facing the window. This lessens the shadows, and brightens up the image significantly. Using a self-timer for this is key.

Turn on your camera's self-timer. Using this will allow a hands-free shot that will be perfectly still and not blurry. Focus on your work, get the proper exposure, and then start taking pictures.


Take a few photos to be safe and then look at them on the screen to make sure you have what you need. Zoom in on the pictures to see if they're sharp or blurry. If they're blurry, make sure your camera is properly focused on your product. If you're in zoom, make sure it's not fully zoomed as lenses are never at their sharpest with fully zoomed in or out. Lastly, use that self-timer on your camera to avoid any camera shake that might result from pushing the shutter button.

If your photos are too dark or light, you can adjust this in-camera by using exposure compensation. It's always best to get the correct exposure in-camera than fixing it on the computer as making adjustments in Photoshop can degrade image quality.
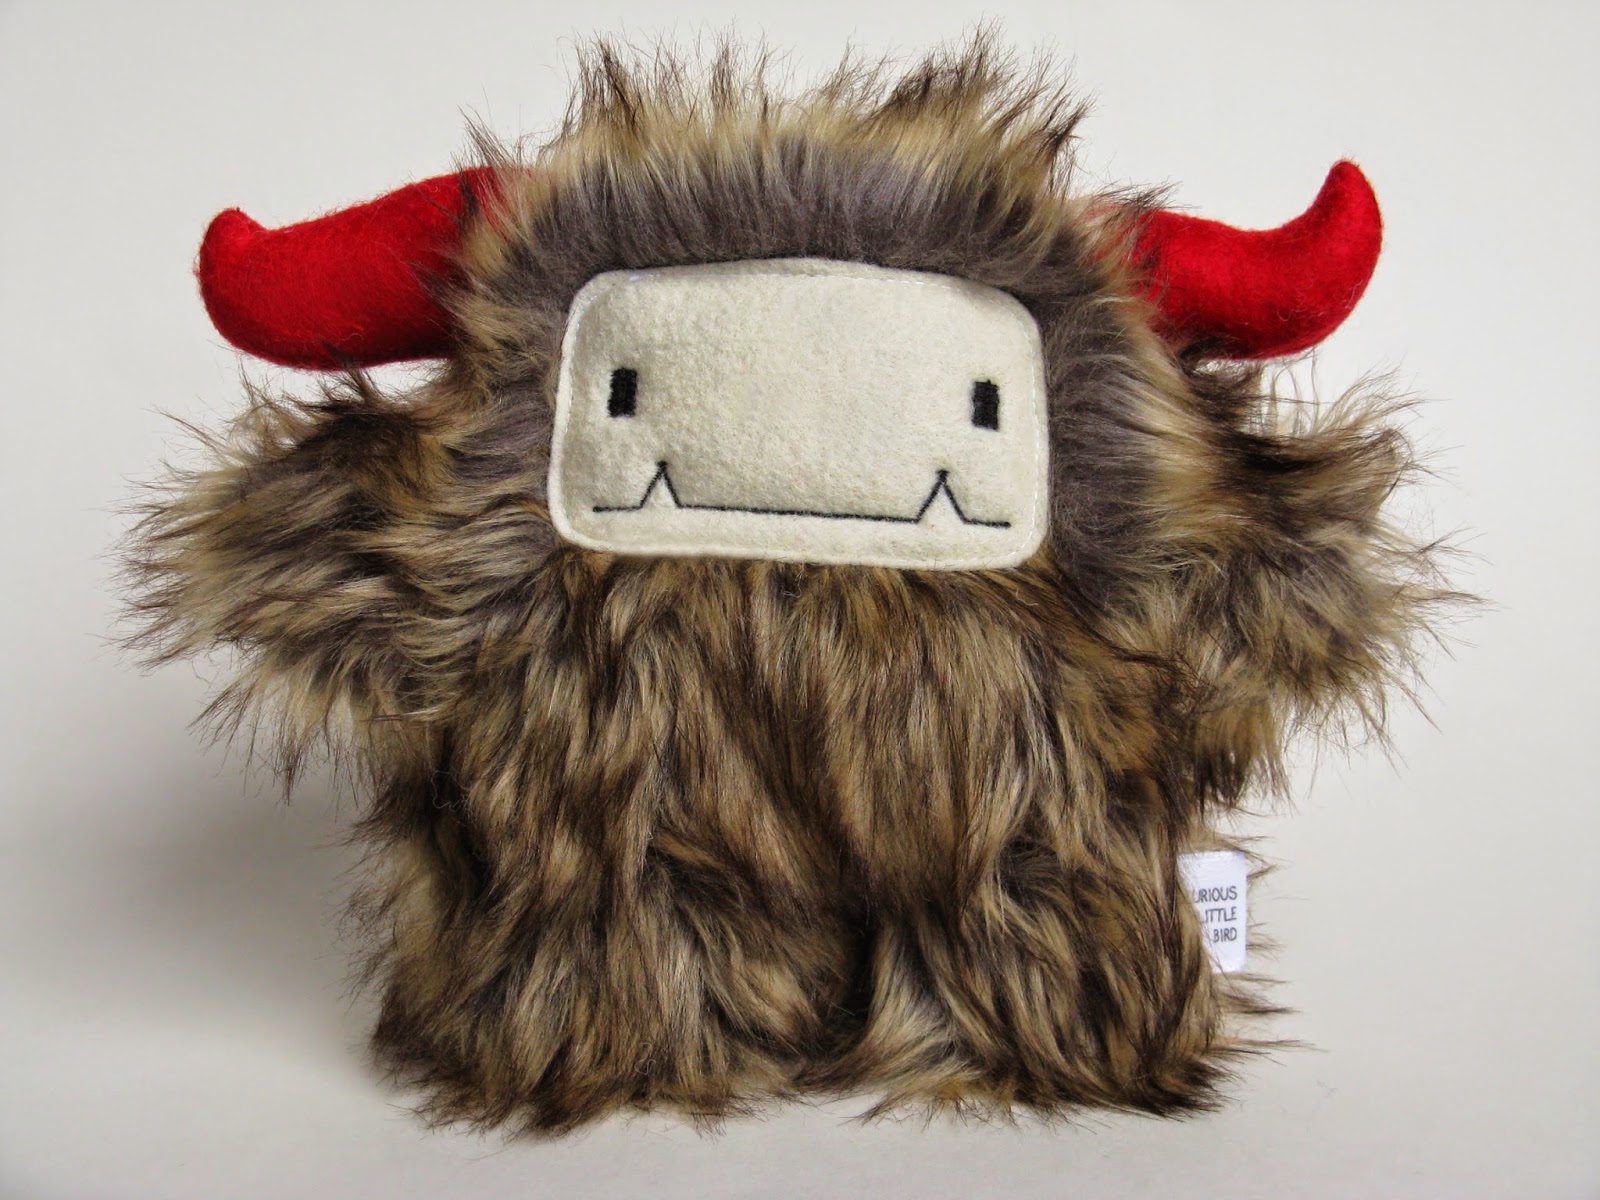
What my photo looks like when I view it in Photoshop. Time to do a little adjustment.

Preparing your digital files

Once you're done taking photos, connect your camera or memory card to your computer and open them using your program of choice (Photoshop, Preview, iPhoto).

Zoom into your artwork at 100% and double check that all your images are sharp and correctly colour balanced. You want your work to look as close as possible to how it does in real life. This is important for online marketplaces. Customers don't want to be surprised when buying an item.

If you're happy with your work, crop your image so the extra space is removed, and your artwork is visible. 
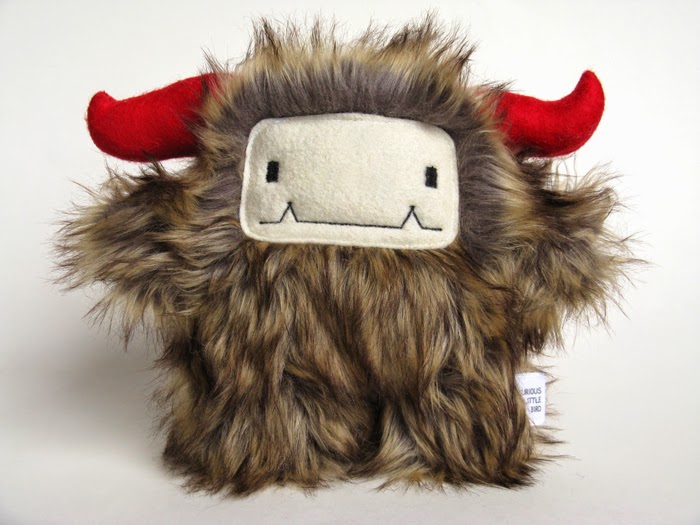
After some adjustments, the background is noticeably brighter without ruining the monster itself. 

Save a copy at full resolution!! You never know when someone might want a high resolution copy for their website/blog or magazine. I've often missed this step, and was stuck with low res images. If you're using Photoshop, keep the .psd file for this.

Resize your images. I found a trick for this. Again if you're using Photoshop, I will save my images to Web (shift+ctrl+command+S). This way I can easily resize it to my low res, and choose .jpg. This method ensures you don't accidentally save over your large resolution image.  If you're using Etsy, a good size is 600x480 pixels. Big Cartel's images are more square so 600x600 is good too. Make sure when you save a copy, that you add "sm" or "small" at the end so you can distinguish which image is the high res, and which is the low res. I like to save all my high resolution images in their own folder named 'high res' so as not to get mixed up. If you're saving these images for your online shop, you also have to think about SEO. Rename the low res file with the appropriate keywords so your images are found in Google etc. Example: brown-circular-embroidery-hoop.jpg

Once you're all finished, you can then upload them to your website!

Pssst... did you know that most of my photos in this blog (save for the last two) were taken with my iPad?? :)

Good luck, and I hope this has helped you! If you have any questions, feel free to leave them in the comments (and follow the replies so you'll get my responses). :)

Friday, April 04, 2014

2014 One Of A Kind Spring Show wrap up and overview.

Hello!! How's everyone today? I've been back from Toronto for a few days now, decompressing, relaxing, taking some time off. Working at the One Of A Kind show really does take a lot of work, and recovery takes time. But all in all the show was awesome!! I met so many nice people, and got some great exposure! If you haven't been following me on Facebook or Instagram, here are some photos from the week. I didn't have a chance to get any photos of the kiddie models walking down the runway with a few Curious Little Bird monsters. A shame! My 3 month marathon monster making definitely paid off.  I also want to thank everyone who came to visit, and those who drove for hours just to say hi! You made my day!

My booth was a small space. It was 3 feet x 3 feet, and had a 360ยบ view. On opening morning I realized my price signs were too awful looking, and ended taking them all down. This encouraged people to approach my booth, touch the soft monsters, and talk to me. Works every time. I keep forgetting this part. :)


The monster pillows were a hit. By Sunday I had sold my very last one. I will have at least 3 times the amount for the Christmas show.


The publicist for OOAK wanted a few of my monsters for the Canada AM morning spot. They decided to choose the green & rainbow pillow monster. Look at how cute he looks on TV!! If you happened to catch it, he was the star of the show. :) You can watch the spot here!


My booth was looking pretty empty by Sunday. Those pillow guys were all gone, and I had to fill all the cubes with the smaller guys.


On Wednesday I also got interviewed for InnerSpace on the Space Channel, but sadly they didn't use it. I did get a 1 second shot of a yeti at the very end. You can watch that episode here


The girls at the beginning of the show, Jaimie and Jessica, make awesome dolls and little felt guys. Their business is called Magic Circus. Below is a felt Mad Scientist from Jessica Craddock. I fell in love with him right away. I just love his feather boa hair!! And the details are awesome.


These lovely ladies are made by Jaimie Craddock, and are poseable, and all made with air drying clay? They're extremely awesome!!


Selfie!!! I got as many awesome compliments about my hair and my outfit creating a branding effect with my monsters, as I did compliments about how cute my monsters were. :)


Finally my Day In The Country monster competition piece. He didn't win the media vote, but I'm still waiting for the people's vote. I'm hoping to win!! :D


I'll keep you updated with new things as they happen later on. For how I'm enjoying my brief time off from work. Monday is back to the grind. I've been asked multiple times from customers if I'm going to be at OOAK for Christmas, and I've told them all I've applied, but won't hear back until June. So starting Monday I must work to build up my inventory as if I am already accepted. Hopefully I'll have new things to show you in the next few weeks/months. Let's just say I had a detailed talk with a customer about a monster pillow backpack.... One side is furry and fun, and the other is leather-like (or vinyl) and very discreet. I may make a few!! I have some vinyl hiding around here somewhere. :) Stay tuned!!

Here's to a great start to 2014!


Wednesday, March 19, 2014

In the studio..... 7 days to OOAK and counting....

It's officially 1 week or 7 whole days until the One Of A Kind show is actually happening!! I couldn't keep to my work schedule because of some unexpected things happening. For one, I got sick last Wednesday, and ended up spending most of the day on the couch. But I'm slowly getting better. I just need to force myself to drink tons of water, and I should be healthy by the time I get to Toronto.

This week I'm finishing up my yetis. I've got both Fenwicks (teenage yetis with small horns), and Geoffreys (large ram-like horns).


 Yeti


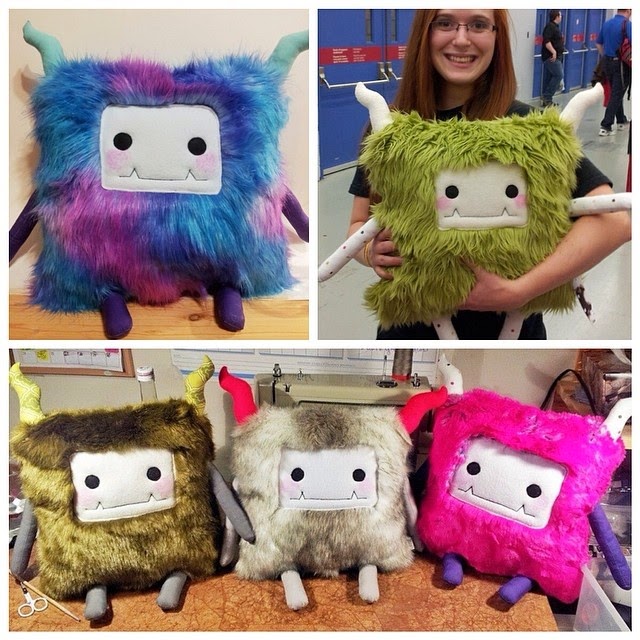
I have been trying to finish up 6 more pillow monsters for the show. As you can see in the photo the arms, legs and horns are all ready and stuffed. All that needs doing is sewing on the faces, embroidering the expressions, sewing on the limbs, pinning, sewing, and closing. Okay.... that does sound like a lot more work when I write it out like that. :)


Most of the pillows (bottom 3, and top right) will be for sale at the show, and a few more :)

For now I have to focus on finishing my yetis. I don't have any already made, and I'd really like these to be on display. Then I have to get my 2nd sign painted, design, print and laminate some price signs, and finally clean my apartment. If I have any time left I may finish a pillow monster or two. This poster is exactly how I feel right now. ;)


On your way in to the show, don't forget to browse the front entrance display. A few of my fleece monsters for babies will be there, smiling away!


Last but not least, if you are coming to the One Of A Kind show, here's a link to get discounted tickets. Click on the picture and it'll take you to the website to get the discount :) This promo code will instantly offer a $1 off saving from online adult admission ($12-$1 = $11).

You can find me in the RISING STAR section, booth P21!


Wish me luck!! I hope this will be the most successful handmade show I do this year. Unless of course I get accepted to the Christmas One Of A Kind show, in that case THAT will be the most successful, and spring will be awesome!!

Friday, March 07, 2014

19 Days and counting to the One of A Kind Show!!

You heard me right, there are only 19 days left to the largest North American Handmade show, and I can feel the stress of not being done creeping up on me. In the next two weeks I have to get everything I want done done, and then I can relax before I leave.  I'm nervous because I've never been an exhibitor in a show of this grandeur, and it's very exciting, and also quite the investment... But as you can see the tickets are here, and the show is very nearly here..... <taking deep breaths... trying to stay calm and collected>


I still have a few tickets to hand out to retailers. I'm hoping to find some free time to email everyone. :)  If you are a retailer in the Toronto / Ontario region and you would like to meet me and see my monsters in person, please message me and I will gladly put a ticket aside for you!


I can't believe this pile of almost, yet not quite finished, monsters are piling up! It's starting to get scary, this pile. There at least 24 or more monsters. Looks like I'll have to work this weekend to finish them. I work in a production line setting, doing all the cutting first and then sewing, then stuffing. I give myself a quota of 6 monsters a day so as not to overwhelm myself, and make work seem less crazy.

Here I am, hard at work!!


Here's one of my cats, Littleone. He's furry feline supervisor that likes to watch over me, making sure I do all of my work!


I think it's nice to have a nice group shot of all my monsters that I have finished all put together. Gives me a great sense of accomplishment. That all my hard work is not for not. Can I say that? :)


Well 19 days and counting! If you're going to be going to Toronto, and stopping by at the One of A Kind Show, don't forget to stop by the Rising Star section and say hello! My booth is P21!

Wish me luck!!!   You can check out my artist profile on their site!

Saturday, February 22, 2014

Murder mystery GIF...


I sense an evil scheme is happening.... This is what happens in my work studio when I walk away for a few minutes. ‪It looks like Kat (the purple monster with the yellow unicorn) is in trouble!!


Wednesday, February 19, 2014

Why not celebrate your wedding with a monster?

Wedding Couple  -  Photo credit: www.therickardnilsson.com


It's that time of year when weddings are happening. Spring is just around the corner, and everyone wants to tie the knot with the new growth of the coming of the most wonderful part of the year... The year when the cold and snow is over!

If you're marrying the man (or woman) of your dreams, you're going to want to get her a gift, right? Can I be so bold as to suggest the best, and most creative gift you could ever get your lifetime lover/partner/friend? Have you guessed it yet? A monster!

Okay, so monsters aren't for everyone, but if you're an edgy couple, and you really love to buy locally and support your local artists, you could consider Curious Little Bird for your monster needs. :) I offer ready made monsters in different colours and styles, and I also offer custom made monsters. Monsters that you can customize. Imagine two monsters, each made to represent you and your wife (or you and your husband).

Or even some custom made embroidery hoop (see photo below). This would make a great wedding present.


Think of us for your wedding monster needs. :)

www.curiouslittlebird.ca


Saturday, February 15, 2014

Mini Moose is making bagels!


I learned how to make bagels a few weeks ago, and I want to share the recipe with you! I got it from King Arthur Flour, so it's a copy paste recipe. I'll add the original link at the bottom.

I've made this recipe twice so far. I'm still a fairly new bread maker, so if you have any issues, I recommend checking out the link I provide at the bottom. The original website answers some questions. :) I'll provide some helpful hints at the bottom if you're not an expert baker like myself.

I don't have a bread machine, or a heavy duty mixer, so the 'kneading' has to be done by hand. I found this video of a chef that shows his method of kneading the dough. I have to say it's really noisy, but much more fun! I learned from this video the correct way to make dough, as I've been doing it wrong this whole time! Who knew!? :)

On to the recipe!

******

Dough
1 tablespoon instant yeast
4 cups (17 ounces) King Arthur Unbleached Bread Flour
2 teaspoons salt
1 tablespoon non-diastatic malt powder, brown sugar or barley malt syrup
1 1/2 cups (12 ounces) water, lukewarm

Water Bath
2 quarts (64 ounces or 8 cups) water
2 tablespoons non-diastatic malt powder, brown sugar or barley malt syrup
1 tablespoon granulated sugar

Manual/Mixer Method: To make this dough by hand or in a mixer, combine all of the dough ingredients and knead vigorously, by hand for 10 to 15 minutes, or by machine on medium-low speed for about 10 minutes. Since we're using a high-protein bread flour here, it takes a bit more effort and time to develop the gluten. The dough will be quite stiff; if you're using an electric mixer it will "thwap" the sides of the bowl, and hold its shape (without spreading at all) when you stop the mixer. Place the dough in a lightly greased bowl, and set it aside to rise till noticeably puffy though not necessarily doubled in bulk, 1 to 1 1/2 hours.

Bread Machine Method: Place all of the dough ingredients in the pan of the machine, program the machine for Dough or Manual, and press Start. Check the dough after 10 minutes; it should be quite stiff, and won't have formed a smooth ball. The dough will feel quite firm when you poke your finger into it. Allow the machine to complete its cycle, then complete bagels as instructed below.

Transfer the dough to a work surface, and divide it into eight pieces. Working with one piece at a time, roll it into a smooth, round ball. Cover the balls with plastic wrap, and let them rest for 30 minutes. They'll puff up very slightly.

While the dough is resting, prepare the water bath by heating the water, malt and sugar to a very gentle boil in a large, wide-diameter pan. Preheat your oven to 425°F.

Use your index finger to poke a hole through the center of each ball, then twirl the dough on your finger to stretch the hole till it's about 2 inches in diameter (the entire bagel will be about 4 inches across). Place each bagel on a lightly greased or parchment-lined baking sheet, and repeat with the remaining pieces of dough.

Transfer the bagels, four at a time if possible, to the simmering water. Increase the heat under the pan to bring the water back up to a gently simmering boil, if necessary. Cook the bagels for 2 minutes, flip them over, and cook 1 minute more. Using a skimmer or strainer, remove the bagels from the water and place them back on the baking sheet. Repeat with the remaining bagels.

Bake the bagels for 20 to 25 minutes, or until they're as deep brown as you like, turning them over about 15 minutes into the baking time (this will help them remain tall and round). Remove the bagels from the oven, and cool completely on a wire rack. Yield: 8 bagels.

Variations
To make sesame seed or poppy seed (or other seed) bagels, brush each bagel, just before baking, with a glaze made of 1 egg white beaten till frothy with 1 tablespoon of water. Glaze each bagel, and sprinkle heavily with seeds.

To make onion-topped bagels, bake bagels for 20 to 22 minutes (or until they're almost as brown as you like), and remove the pan from the oven, keeping the oven turned on. Working with one bagel at a time, glaze as instructed above, and sprinkle with minced, dried onion. Return the bagels to the oven for no more than 2 minutes (the onions will burn if the bagels are left in longer than that).

Want to make cinnamon-raisin bagels? Knead about 2/3 cup of raisins into the dough toward the end of the kneading process. Just before you're done kneading, sprinkle your work surface heavily with cinnamon-sugar, and give the dough a few more turns; it'll pick up the cinnamon-sugar in irregular swirls. Divide the dough into eight pieces, form each piece into a ball, and roll each ball in additional cinnamon-sugar. Proceed to let rest and shape as directed above.

We've seen bagel-store bagels in varieties as diverse as jalapeno pepper, spinach and cheese, and marbled rye. You can make bagels with just about any kind of bread dough. To retain the characteristic chewy texture, just be sure to make a dough that's low in fat, and follow the shaping, rising, boiling and baking techniques.

Nutritional information per serving (1 plain bagel, 111g): 211 cal, .5g fat, 7g protein, 43g complex carbohydrates, 2g sugar, 2g dietary fiber, 536mg sodium, 101mg potassium, 3mg iron, 106mg calcium, 67mg phosphorus.

******

http://www.kingarthurflour.com/recipes/bagels-recipe#reviews

******

If you make these, let me know in the comments how they turned out! :) The photo above is my last batch of bagels. Mini Moose really, really likes them!

Wednesday, February 12, 2014

Win this monster for FREE today only!


Want to win this lovely, limited edition monster?? Workshop Studio Boutique is having a February giveaway, and today is win a Curious Little Bird monster. Don't hesitate, because the contest closes at midnight EST tonight, February 12.

Follow this link to enter!  http://workshopandflock.com/feb-12th-giveaway-by-curious-little-bird/

Good luck!!

Thursday, February 06, 2014

Discount tickets for One Of A Kind show!


For those of you who are going to the One Of A Kind show, you can now get your discounted tickets! Click the photo above to go directly to the website to get your tickets. :)

If that link doesn't work, you can click HERE.

I'll post more info as I get it... like what booth I'm going to be in.

Cheers!

Monday, February 03, 2014

Curious Little Bird is going to be at the spring One of a Kind show in Toronto!


I'm really excited, and a little stressed out, to be exhibiting at one of North America's largest handmade shows! This is going to be my very first time attending the OOAK show. I've never even been as a shopper, so this is literally going to be the biggest show I've attended (besides Montreal Comiccon).

Sign up to get updates on my blog, because I will be posting photos of the monsters I will be creating especially for the show! You can get a sneak preview of what will be for sale, and you can pre-plan your shopping trip.

Speaking of new things… Here's a sneak peak of what I've made so far for the show…

Monsterific cell phone sleeves!

It's an army of bearded monsters, and there's still more to come!

These guys captured my felted owl, and are up to no good.

Oh no! They've ganged up on one of their own!

Some furry keychains! All will be for sale except for the black one. No black keychains will be available.
That's it for now. You can subscribe to my blog via email, or bloglovin' or RSS feed to get updates on the show. A sneak peek is always fun.