Hello fellow readers! I have something great to share with you today!
Many people have asked me how I make my labels so I have decided to make this little tutorial including pictures and any little tips that I have learned along the way. You will find that making your own labels is quite simple and much cheaper than purchasing custom labels. However, they're not good for items that will get washed often, as the transfer paper will wash off sometimes. It's best to experiment with different kinds of ribbon.
On to the tutorial then! :)
Materials needed:
• Computer, graphics program (I used Illustrator) & inkjet printer
• Regular printer paper
• Iron-on t-shirt transfer paper
• Utility knife, cutting mat & metal ruler
• Ribbon (I used 1/2 inch single faced satin)
• Iron & ironing board
• Scissors
Step 1: Design your image using your program of choice working with a resolution of 300ppi for a clear image. The height of your image should be smaller than the width of your ribbon. Print some out on regular paper, cut them out and see how they fit on your ribbon. Fill up an entire page, repeating images in rows and leaving about a quarter of an inch between the images in each row. I like to add 0.15pt lines to separate my logo, and I use that as my guide for cutting. Make sure when you print your image, that you reverse the image. If you use Illustrator to do your labels, this last step is not necessary as there is an option to print your image as a reverse. If you use Photoshop, then you should choose Image > ImageRotation > Flip Image Horizontally
Step 2: Print your image once it's reversed (or print it in reverse if using Illustrator). Follow the transfer paper instructions to set your printer for the right type of paper. Print a test sheet on regular paper first making sure that the image is reversed. Print a sheet of labels on the transfer paper. I like to print 4-5 sheets at a time. I get 40 labels per sheet, so 5 sheets gives me 200 labels.
Step 3: Cut out the images preferably into long strips using your utility knife, cutting mat and ruler. Leaving them in strips will save time when ironing and you will be less likely to burn your fingertips.
Step 4: Iron the transfer onto the ribbon. Lay the ribbon flat. At this point, depending on the kind of ribbon you're using, place the single faced ribbon satin side down so you've got the non satin side facing up. Place a strip printed side down. Press the strip down with the iron. I like to hold the iron on half of the strip for 10-15 seconds, then I lift the iron and move it to the other side. I try not to move the iron back and forth too much, otherwise I get stretched logos that look bad.
 |
| Notice the monster on the bottom right is slightly stretched out?? That's cause I pushed the iron back and forth too much! Don't do that! |
Step 5: Peel off the backing paper. Wait until all your labels are ironed on the ribbon, and the ribbon has cooled before removing the paper. I always leave the previous paper strip on to protect the iron when I am adding a new strip. *The transfer will melt if the iron touches it! If you don't iron your labels properly, the below happens…. Sadly for every sheet of labels, I usually get 1-2 that are messed. Either the image is too stretched to look good, or the transfer paper wasn't properly ironed, and it looks like this:
Step 6: Cut the labels. Once you've finished peeling off the transfer paper from the ribbon, you're ready to cut them! See the ultra thin lines in between the logos? That's the line I use to cut with my scissors. I'm sorry I don't have an actual photo of me cutting, but I think that's pretty easy to figure out. :)
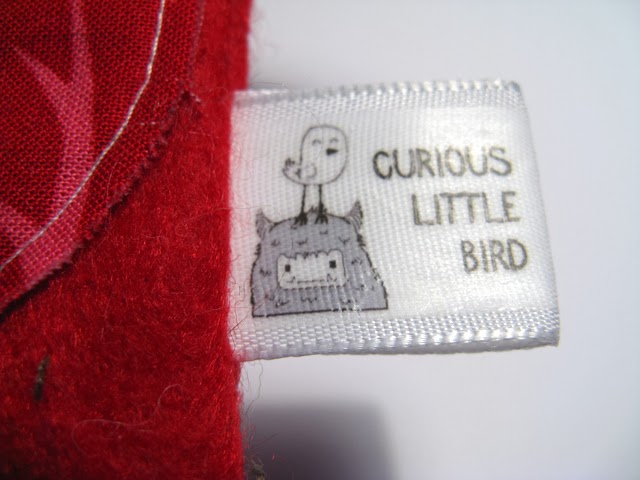
Step 7: Use them! Make a whole roll of labels or cut them as desired. You can fold them in half and sew them into a seam to create a loop tag. Now you are ready to add them to all your wonderful creations!
***Additional TIP ***
To remove most of the plastic feel of the transfer paper and to set the image even more, lay baking parchment paper over the transferred image and iron again with a hot iron. It really works!
Good luck!


